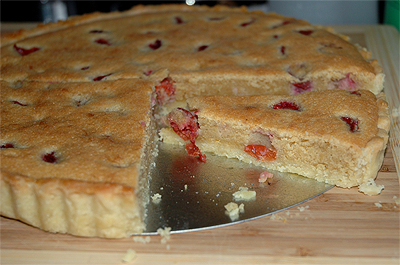
Sure, being called "nutty" is probably not the greatest thing in the world, but I must confess that I am quite a goofball myself, and to the average person out there, I probably do seem a bit "nutty" in their eyes. Calling me a tart however will seriously earn you my well-known "death" glare. However, this nutty tart is neither a crazy nut, nor a scandalous tart, but a delicious Cherry Frangipane Tart. What other kind of tart did you think I could have possibly been referring to?
It's hard for me to stay out of the kitchen for long, especially when I'm at home and thus, at the disposal of many of my beloved kitchen gadgets that I'm sorely lacking back in London. While I should seriously be working on the numerous assignments I have due in March to relieve myself of the workload (and stressload!) that'll be coming up in the next few weeks, I just couldn't help sneaking into the kitchen this morning to make a tart. I've been itching to make a tart lately, a pastry that has seriously been overlooked by me in the past. Mostly it has always been my fear and hatred of dealing with pie and tart crusts, as I've mentioned in the past, but I've slowly been conquering that fear with practice, and gaining confidence.

I came across this wonderful tart recipe over at Happy Home Baking (I've referred to this blog a few times before. It seriously is a great blog to check out if you haven't already!). The pictures of her tart looked gorgeous and beckoned me to try it out for myself. I didn't want to use canned peaches though (can you imagine how good this tart would be though when I'll have fresh peaches to work with later this summer?), so I pulled out a tub of frozen sour cherries from the deep freezer. The sweetness of the frangipane with the tartness of the cherries...how could you go wrong?
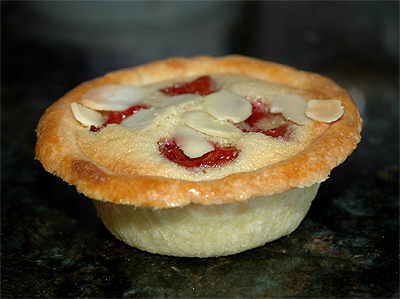
I ended up doubling the recipe though, since the original recipe yield one 18-cm tart, and I could only find my 23-cm tart mould. By doubling the recipe, I ended up with one 23-cm tart and 2 mini tarts. The crust was a dream to work with; it was soft and supple and rolled out easily without cracking. I did add two extra tablespoons of egg to help bind the dough better, since I found it slightly too dry (ah, there's my fear of dry, cracked crust dough again!). What's so great about this recipe is that I didn't have to fish out my pie weights; it bakes blind without any weights whatsoever! Hurrahs all around for less cleanup!
Another thing I loved about this recipe is that it completely used all-natural ingredients. No almond extract was used at all, so you didn't get that superly artificial almond flavour in the tart; all you got was the pure almond flavour from the ground almonds used both in the crust and the frangipane filling. The filling wasn't too sweet and definitely complimented the tartness of the cherries rather well, while the crust was deliciously buttery and fragrant from the ground almonds. It will definitely be a crust I will be using in the future for other tarts. Oh, and the mini tarts...they look adorable!

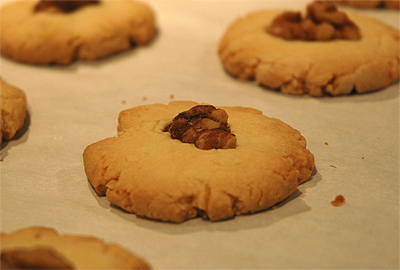
Continuing my obsession with ground almonds today, I also decided to make Almond Cookies. These are quite a popular Chinese treat, but it's hard to find really good ones in North America now, unless you're in the large cities with a dominant Chinese community (ie: Toronto, Vancouver...you get the picture). I found a recipe in a cookie book I bought in Hong Kong last year and thought I would give it a try. The end result wasn't bad, although it still a long way from the true Chinese almond cookies, which are have an amazing almond fragrance and flavour but also melts in your mouth. These cookies were more on the crispier side, and could use a bit more of an almond impact flavour-wise. Alas, it wasn't until after these came out of the oven that my dad pointed out we had whole almonds; oh well, the walnuts add some contrast to the cookie, both aesthetically and flavour-wise. However, I'd love to try these cookies again the next time around with ground walnuts and see how those will turn out!
Almond Cookies
Adapted from Japanese Cookies
Makes about 20
- 70 g unsalted butter, at room temperature
- 40 g caster sugar
- 1 egg yolk
- 140 g soft (cake) flour
- 40 g ground almonds (see Note)
- Pinch of salt
- 20 whole almonds, cashews or walnut halves
- Preheat oven to 325°F. Line a baking sheet with parchment paper.
- In a bowl, cream butter and sugar until fluffy and creamy, then gradually add the egg yolk and mix well.
- Sift together the soft flour and the ground almonds. Fold into the butter mixture with a spatula.
- Divide the dough into smaller portions, each weighing about 15 g (about 1-inch balls). Roll the dough into balls, place on a baking sheet and flatten slightly. Top each cookie with a nut.
- Bake for 15 to 20 minutes, or until golden brown. Let cool completely on a rack.
Note: I like to toaste my ground almonds prior to using them, to enhance its flavour. Put the ground almonds on a baking sheet and pop them in a 250°F oven for about 10 minutes, or until fragrant, shaking the pan every few minutes. I also ended up adding a bit more ground almonds than it was called for in the recipe, to give the cookie a bit more of an almond impact. If you do so, just make sure to not add the flour all at once, so that you can control the moisture of your dough.


