Pages

Friday 30 March 2007

Torta al "Ferrero Rocher"

Posted by Bonita

Well, it finally happened. My computer finally died on me after six months of constant instability in our relationship. Thus, I have been unable to update my blessed blog, but it certainly didn’t stop me from being productive in the kitchen, even as I attempt to spew out four papers at the same time.

As per usual, Sundays are usually my days for self-indulgence in the kitchen, and this past Sunday was no exception. Not only did I make an actual meal (after a week of pulling out my pre-made frozen meals and reheating it) AND dessert. Sometimes it’s nice to remind yourself to love yourself.

mar28_02

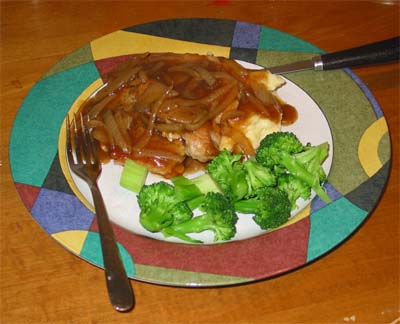
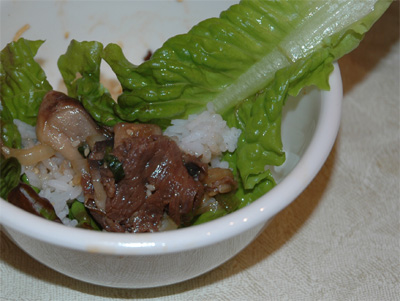
With my busy schedule though, I still wanted to keep things easy, simple and fast for now. My mom used to always make this pork chop dish with gravy and onions, and it was definitely a Hong-Kong-ized version of Western food. This dish is so easy to make. For one serving, take a pork chop cutlet (I tend to use a center-loin cut, but feel free to use whatever cut you like. If it’s a thick cut, it might be best to butterfly it so that it’ll make the cooking process faster and easier) and season with salt and pepper. Heat a frying pan with some oil on medium-high heat and brown the chop until there’s a nice, golden crust, about 3 to 4 minutes on each side. While the pork chop is cooking, slice one medium onion. Measure out 1 cup water with about 1 tablespoon cornstarch, a couple of drops of soy sauce (about 1-2 tablespoons), some ground black pepper and stir together. Once the pork chop has been browned, set aside and thrown in the onions into the still-hot pan. Stir until softened, about 2 to 3 minutes, and then add the water and soy sauce mixture and let it thicken. Once it starts bubbling, add the pork chop and let it rest in the simmering sauce until thoroughly cooked through (or until reheated if it was already cooked through). Turn off heat and serve with rice, potatoes or pasta.

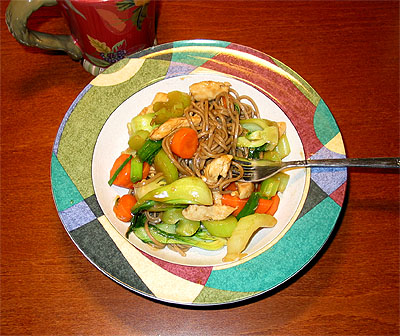
It’s a super easy dish, and while the gravy sauce is really simple, it definitely tastes great and compliments the pork chop well. I served my pork chop with whipped roasted garlic potatoes and some steamed broccoli.

mar28_01

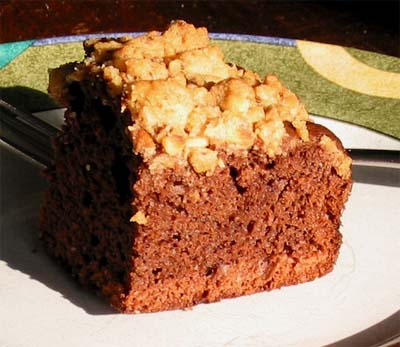
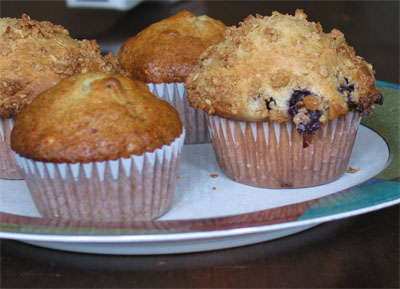
Flipping through my Muffin book earlier in the week, a recipe for a Chocolate Coffee Cake caught my eye. I mean, it’s cake AND it’s chocolate…what’s not to love about it? However, I did change the streusel topping, deciding that a hazelnut streusel topping would compliment the chocolate cake nicely and jazz up an otherwise simple cake. The use of hazelnuts was definitely a good idea; my friends loved it and Nicole even said it reminded her of Ferrero Rocher chocolates! The streusel topping is definitely my favourite part of this cake, but the cake itself is just right in its chocolatey-ness and is moist. This cake an easily become my new favourite coffee cake, perfect with a cup of coffee or tea.
Chocolate Coffee Cake with Hazelnut Streusel
Adapted from The Williams-Sonoma Collection: Muffins
Makes one 9-by-13 inch (23-by-33 cm) cake

For the streusel:
2/3 cup all purpose flour
½ cup firmly packed light brown sugar
½ teaspoon ground cinnamon (see N.B.)
1/3 cup cold unsalted butter
¾ cup hazelnuts, toasted and finely chopped

1 ½ cups all purpose flour
½ cup cake flour
2/3 cup unsweetened Dutch-process cocoa powder
1 teaspoon each baking soda and baking powder
½ teaspoon salt
½ cup unsalted butter
1 cup granulated sugar
3 large eggs
1 ¼ cups sour cream
11/2 teaspoons vanilla extract

1. Preheat the oven to 350°F. Grease and flour a 9-by-13-inch baking pan or dish.
2. To make the streusel, stir together the flour, brown sugar, and cinnamon in a small bowl. Cut the butter into small pieces and add to the bowl. Using a pastry cutter or your fingers, cut or rub in the butter until coarse crumbs form. Stir in the hazelnuts until evenly distributed. Set aside.
3. In a bowl, sift and stir together the all-purpose and cake flours, cocoa, baking soda, baking powder and salt.
4. In another bowl, cream together the butter and sugar until light and fluffy. Add the eggs, one at a time, beating thoroughly after each addition. Add the dry ingredients in 2 or 3 increments, alternating with the sour cream and vanilla. Beat until smooth and fluffy, about 2 minutes.
5. Spoon the batter into the prepared pan and spread evenly. Sprinkle evenly with the streusel.
6. Bake until the topping is golden brown, 40-45 minutes. A tooth-pick inserted in the center of the cake should come out clean. Transfer the pan to a wire rack and let cool completely. Cut into squares to serve.

N.B. I accidentally put in 1 teaspoon rather than 1/2 teaspoon, which only makes it more cinnamony. I definitely didn't mind the extra spice!

Wednesday 21 March 2007

Quick & Easy Stir-Fry

Posted by Bonita

I have a confession to make: I can’t actually cook authentic Chinese food. I know! It’s terrible of me! I’m Chinese, so you’d think I’d know how to cook real, authentic Chinese dishes. And you’re probably wondering, “What kind of mother doesn’t teach her daughter to cook food of her own heritage?” Let me just say it’s not my mother’s fault. There were plenty of times I could have learned from my ever-so-talented mother; I just chose never to do so. I guess partly it comes from laziness, and the other part comes from wanting to be spoiled. It’s just easier to sit back and let my mom do the cooking (since she enjoys it anyway, so why should I crash her party, right?).

Secondly, I always had this mentality that Chinese dishes are complicated. It might not, who knows! But the fact that Chinese meals are eaten family-style often means making 3 or 4 different dishes per meal (excluding the rice). A real Chinese meal has variety, and frankly, I do not have the time nor the room (both in my stomach and my fridge) to make 2 or 3 different dishes every night.

Thus, I often turn to my pseudo-Asian-inspired dishes. I often do stir-fries because: 1) they are “healthy”, depending on what you put in it, 2) it’s versatile, and 3) quick and easy to prepare. I love doing a chicken and vegetable stir-fry or a purely vegetarian stir-fry with tofu, and often serve it over a bed of rice (either white or brown) or noodles.

mar22_01

I typically stir-fry my meat and/or vegetables with about 3 tablespoons of hoisin sauce. Hoisin sauce is also known as Chinese barbeque sauce, and has a sweet-quality to it, thus adding just the right amount of sweetness to the dish. It can be found in many (if not all) supermarkets in the Asian-food aisle. I also throw in ½ teaspoon of Chinese five-spice (1/4 tsp tossed with the cooked yaskisoba and ¼ tsp tossed into the meat/vegetables while they are cooking). I’m a huge fan of Chinese five-spice because I think it adds a whole new layer and depth to any Asian dish. I typically serve my stir-fry with soba noodles, which I’ve boiled according to the package, then rinsed with cold water before tossing it with the five-spice. After having added the hoisin sauce to the wok, I’ll toss in the yakisoba and toss everything together until heated through. Use any vegetables you have on hand: carrots, celery, Chinese vegetables (I love using Shanghai baby bok choy), beansprouts, Asian eggplants, zucchini…whatever suits your fancy and whatever you have sitting in the fridge. Any meat will work too, although I typically tend to use chicken or tofu (for a vegetarian alternative). And don’t forget some minced garlic and ginger! It’s a must in any stir-fry!

Monday 19 March 2007

In need of therapy

Posted by Bonita

I hate how school has taken over my life right now, and thus forcing me to neglect everything else in my life: my social life, house chores, my blogs… Essay season also has a way of always making me moody, which really translate into hiding out in my room, away from any possibly social interaction, with a bag or box of chocolate. Total self-destruction.

mar13_01

Last week, I went through a box of chocolates Nicole got me, filled to the top with robin’s eggs, Hershey’s Kisses, and the oh-so-addictive Cadbury Mini-Eggs. I had planned to save it for two weeks later, when I’d actually be trying desperately to get those papers finished and handed in. I even put them away in the dark corner of my closet. Alas, three days later, I found myself putting my hand into an pretty pink, but empty, box. Let’s just say when I’m moody, my self-control is pretty non-existent. My saving grace is that I haven’t gorged through my box of Godiva chocolates. That, my friends, must be savoured…and also saved for the REALLY bad days.

Thus, my stomach has been hating me all weekend. I think I’ve ruined my digestive system with the overload of sugar it got last week. Therefore, I’m banning chocolate from my life this week, which will be a difficult feat considering chocolate is the love of my life. On that note, to get myself out of my moody funk, I turned to my tried and true therapy: baking. Wanting to make a morning treat for my Italian class, I contemplated what to make them. At first, I wanted to experiment with making raspberry white chocolate scones. The coffee shops on campus sell these and a couple of my friends in my Italian class love them. Alas, I just didn’t have time to play around with a new recipe this morning, with the million other things I have to do, so I decided to whip up two batches of muffins. They’re fast, easy, and oh-so-yummy fresh out of the oven.

mar19_01

Again, I had overripe bananas sitting in the banana hammock, so I made banana muffins, recipe courtesy of Muffins (from the Williams-Sonoma Collection). I honestly love this recipe book. There’s some great muffin recipes, and the Banana Nut Muffin recipe in this book is to-die-for. Super moist with a light texture, and packs a super banana power. I always love making a batch of these whenever I have overripe bananas sitting around and throwing them in the freezer as a quick-fix breakfast.

I’m also still trying to finish off the frozen blueberries in the freezer, so I made blueberry muffins as well, although tried a buttermilk-based version this time, inspired by the recipe at Cream Puffs in Venice (great blog…go check it out!), who got the recipe from . I actually learned how to make your own “buttermilk” this weekend, and thought it would be fun to give it a try. The result: heavenly muffins. It has this nice sponge-cake texture to it (kind of tastes like it too), and the citrus zest (I used orange) really complements the blueberries very nicely. My favourite part was the streusel topping, which provides this yummy, sugary-but-not-too-sugary, crunchy top. I did half walnut, half rolled oats for my streusel. These babies also smell divine while baking in the oven, and there's nothing like waking up my roommates to the fresh smell of cinnamon (or uh...accidentally setting off the fire-alarm). All I can say is that these muffins were a huge hit amongst my classmates today. I don’t think I can make blueberry muffins any other way from now on. I can only imagine the results when I have fresh blueberries to work with come summer time!

Sunday 11 March 2007

Lazy Day Sunday

Posted by Bonita

My apologies for having neglected this blog this past week. There were multiple reasons: 1) the insanity that I call school; 2) my computer is continually being temperamental on me; 3) my super exciting soup diet! Yes, I was back on my infamous soup diet last week, trying to shed off a couple more pounds that were still lingering from Christmas break and carried over into reading week. Good news is, soup diet is ending, which means I can come back to posting. The bad news is that there's still the insanity that I call school, and it will only get worse in the coming weeks.

With Daylight Savings Time pushed ahead by 3 weeks this year, it meant that I would get 1 hour less a whole month earlier. 1 hour of extra sleep, or 1 hour more to do my readings or research. But alas, I sucked it up, and ensuring that I don't sleep until the late hours of the afternoon, I set my clock to 11 (which is shocking coming from me! I usually get up at 8 or 9, even on a weekend so I can do work). Yes, it was one of THOSE lazy Sundays today; a day when you had planned so many things but really didn't accomplish much in the end. Was it wasted? Perhaps, if I look at it from an academic point of view. I probably did a total of 3 hours of homework, and the rest...well...let's just not go there. However, the day wasn't totally wasted. Ended up being domestic today by doing the laundry, cleaning the bathroom, going out to pick up some baking necessities, and oh yeah...BAKED! It's certainly one thing I missed while being on the soup diet: just being in the kitchen! And with a bunch of ripe bananas sitting on the counter screaming, "USE ME!", it was time that I made a fresh loaf of banana bread.

mar11_01

I love banana bread. I love the way it smells when it's baking in the oven, and the banana-ey goodness of it all. It's definitely one of my go-to comfort foods, and it's so easy to make. However, I wasn't always a big fan of them, and that's not the fault of the banana. Nor is it the fault of my mother really. It really all comes down to the recipe that she used. I always found her banana bread (no offense mom) on the dry side. After much experimenting myself over the years, I've settled on my own recipe that yields a delicious, moist loaf. And yes, I made banana bread today, in an attempt to make myself feel like I've atleast accomplished something in an otherwise unproductive day.

This is the easiest recipe ever, and can be whipped up in about 10 minutes. The original recipe calls for butter, which, I'll be honest, does make the loaf taste better (who am I kidding? Butter makes ANYTHING taste better!). However, since I'm just weaning my way out of this diet today, I thought I would make a slightly healthier version (please read note following the recipe).
Bonita's Banana Bread
  • 3/4 cup sugar
  • 1/2 cup butter
  • 3-4 very ripe bananas
  • 2 eggs
  • 1 1/4 cups flour
  • 1/2 tsp salt
  • 1 tsp baking soda
  • 1/2 tsp vanilla extract
  • 1 cup crushed walnuts
  1. Preheat oven to 350°F.
  2. Cream sugar and butter. Add bananas, eggs and vanilla and mix
    well. Sift flour, salt and baking soda together. Add to banana
    mixture and blend well.
  3. Pour batter into a greased 9x5 loaf pan. Bake for 55 minutes, or until
    a cake tester inserted in the centre of the loaf comes out clean. Cool on
    rack.

(N.B. For a low-fat version, replace the 1/2 cup butter with 1/4 cup
vegetable oil and 1/4 cup applesauce. This will result in a wetter batter,
so I adjusted by adding an extra 3/4 cup flour, and increased the baking time by
about 15 minutes.)

Sunday 4 March 2007

Another One-Pot Sunday

Now that I look back, I've realized that I've been doing a lot of one-pot or single-dish meals. Perhaps it's because I only have to cook for myself at home... or perhaps it's because usually the single-dish meals I make have a good share of veggies, meat and carbs. Or perhaps, and this is more true during weeknights, I often just don't have that much time to spend to make more than one dish. So, often you'll find me making either a pasta/noodle dish, or I'd be making a hearty one-pot meal, or I'd serve myself a good stir-fry with some freshly steamed rice on the side. Yeah, it might be on the simplistic side, but one person can only eat so much each day.

Tonight's feature is under the one-pot meal column: beef stew. Again, I didn't rely on a recipe, but after a few more "attempts" I found myself comfortable with my own concoction now. For beef, I had rib steak in my freezer for use. Though I tried pinot noir tonight, I've used merlot before and it has blended with the stew very well. For mushrooms, I used a mix of regular white mushrooms and, to add more flavour, cepes (AKA porcini). As for the ancho chillies, they're just a personal preference and they were in my pantry tonight. These dried forms of the poblano chillies are on the mild side and have their own unique sweetness.


Andrew's Beef Stew
(Makes ~4 servings)
  • ~8 oz. beef, cut into cubes
  • 2 medium onions, cut into sections
  • 1 shallot, halved and sliced thinly
  • 3 cloves garlic, chopped
  • 4 large carrots, cut into bite-sized pieces
  • 4-5 stalks celery, cut into bite-sized pieces*
  • 1/2 cabbage, sliced
  • ~400g mushrooms, sliced
  • 4 Ancho chillies (optional)
  • 1 starchy potato, cut into cubes
  • 1/3 cup pot barley
  • 2 cups beef stock
  • 1 1/4 cups red wine
  • ~1-2 tbsp. extra virgin olive oil
  • ~1 tbsp. sage
  • ~1 tsp. paprika
  • pepper to taste
* If there are celery leaves, chop some and set aside
  1. After preparing the ingredients, pour the olive oil into a heated large pot over medium heat.
  2. Toss the onions, shallot, garlic and celery leaves into the pot, add a small splash of water, cover pot and let cook for 4-5 minutes.
  3. Add the red wine, cover pot again and turn up heat to full. Once the wine begins to boil remove lid to allow the alcohol fumes to disperse. (It is advised that you turn on your kitchen exhaust fan.)
  4. Once the alcohol has been burned off, maintain high heat, add the stock, beef, barley, potato and ancho chillies, and cover pot again.
  5. Once the stock boils, reduce heat to medium-high and add remaining ingredients. Cover and let cook for about 15 minutes.
  6. Reduce heat to between medium and medium-low and stir ingredients evenly and, if ancho chillies are in the mix, gently to keep them whole. Cover pot again and let simmer for ~30 minutes, stirring again after 15 minutes.
  7. Remove the ancho chillies from the stew, remove pot from heat, stir and serve.

Saturday 3 March 2007

A Place of Paradoxes

I heard some good things about Wasabi on Broadway, so when I got there on Friday night I was in a sense not surprised that there were quite a few contrasts as soon as I got there. First, two-storey 19th-century stucco houses are hardly used for Asian restaurants; how often do you see big-city Asian restaurants in places other than boxy commercial buildings? Second, in front of this house that, along with the knee-high iron fencing, blends with the surrounding Broadway West neighbourhood is a smart sign with the restaurant's name in silver cursive letters and outlined with soft magenta neon light. Third, this old house belies the snazzy contemporary interior with both floors used for dining. Fourth, I was seated at a table where across the room I faced a poster of sakura blossoms; with that feisty snowstorm the previous day, spring seems so close, yet so far.

Wasabi is not your "tyipcal" Japanese restauarant where more traditional dishes are served. In fact, this place serves Neo-Japanese ("Shin-Nihon"?) cuisine, with a strong emphasis on the use of fresh and almost always raw seafood. Yes, that means this restaurant is absolute heaven for sushi and sashimi lovers. The decor handily emphasizes the contemporary style. Dark browns and light beiges dance with each other on walls and furniture, accented by a couple of Imperial red walls. Tealights are abound in all forms of holders that fit well with the interiors, and the dim overhead lamps are covered with Japanese-style square shades.

After sipping for a few minutes on my genmai cha, millet-flavoured green tea, a wondrous drink of which I can never have enough, my 8-piece sushi order was first to arrive. I forgot what fish the 8th piece was, but I definitely remember the two types of tuna, yellowtail, salmon, shrimp, squid and octopus I savoured. I don't recall having sushi where the chef did not botch the rice ball portion by compacting it too tightly, not only helping to enhance flavours (as I learned from Good Eats' yours truly), but also to prevent the pieces from being too chewy (unlike the ones I've had from T&T Supermarket, although admittedly they are more travel-friendly because of the compaction). I also took the opportunity to finally try the pickled purple ginger that came as a side with the sushi. Although it worked wonders as a palate cleanser, let's just say that my taste buds convinced me to not have anymore of that stuff.

Though the sushi itself was very good, the "New Style Sashimi" raised the stakes very nicely. Using salmon, bluefin tuna and sea bass, the thin slices were oh so gently pan-seared on one side with olive oil (you read it right, in true avant-garde Japanese style), then lightly sprinkled with shoyu, black and white sesame seeds, green onions and some slivers of regular ginger. The sesame seeds added some nice crispiness and there was just enough shoyu to help bring out the wonderful flavours of the fish. In spite of olive oil having its own flavour that sometimes can conflict with Asian food, this dish didn't pronounce any conflict and was a wonderful twist to traditional sashimi.

Sensing that I still had room for a bit more, I decided to try the "Volcano Roll". This one's a maki-style dish with the rice wrapped around nori which in turn is wrapped around some sweet eel and generous slices of avocado (about three times as thick as what you'd find in supermarket California rolls). Though the sushi itself was good, on its own it would have been on the plainer side. Enter the warm sauce then, and it's this sauce, made with spicy Japanese mayo, tobiko (flying fish roe) and chopped scallops, that gave this dish its name and the wonderful bang to the palate. The result is a dish that is warm, creamy, zingy and absolutely decadent.

There were so many other dishes that I wanted to try (the sunomono salad, served in martini glasses, looked very tempting), but one can only eat so much. This place is one of those restaurants where you get better value (especially gastronomically) if you have others with you to share different dishes and to better experience the creative capabilities of Wasabi's sushi chefs. This is because most of the portions served, including the sushi dishes, are more or less appetizer-sized.

Perhaps when I'm with some people and I've saved up some more money I could try "Omakase", where I'd be completely at the creative mercy of these chefs; requesting "Omakase" basically shows your confidence in the chefs' skills, and it allows the chefs to indulge you with their best and most creative dishes they can conjure.


Name: Wasabi on Broadway
Address: 588 Broadway, Winnipeg, MB
Cuisine: Neo-Japanese
Price Range: Lunch [unknown]; Dinner $30-70
Accessible: 1st floor only

Riding the Hallyu wave

Posted by Bonita

korean_02

I must admit to being part of the “Hallyu” bandwagon. It goes back to late last summer, when I pulled out one of my favourite Korean dramas, Full House, and before I knew it, I was riding the Korean Wave like thousands of other Asians (and non-Asians) out there. Dozens of K-pop songs, dramas and movies later, I still find myself riding the wave. Perhaps my love for all things Korean was only fuelled by my whirlwind trip to Seoul, South Korea this past December. Whatever it is, I’ve turned my Hallyu obsession onto food.

I was lucky enough to be able to try quite a few authentic Korean dishes during my short stay in Seoul. One of my favourites was Bulgogi, marinated slices of beef which are usually grilled and then wrapped in a leaf of lettuce with some rice, kimchi and ssamjang. I was actually craving this dish one day, and so I ended up spending half the day searching on the internet for a recipe that I would be satisfied with. While the recipe I’m currently using is not 100% authentic, it comes close. The only main thing it’s missing is pear purée, but even without it, the dish is absolutely delicious! Since I don’t have a grill in London, and I’m sometimes too lazy to drag out our electric grill pan when I’m at home, cooking the beef over the stove works well. I also like to cook the beef slices with some sliced onions and mushrooms.

korean_03

Since I wanted to make Bulgogi for my parents last night, my mom and I decided to make a Korean meal. Therefore, along with the Bulgogi, my mom made Pajeon with shrimp and crab meat (a seafood version!) and a variation of Japchae. Definitely brought back memories of being back in Seoul!

korean_01

As much as I would have loved to make a Korean sweet for dessert, I decided against it since we still have so much food sitting around the house. However, I did make egg tarts again earlier in the day since I still had some egg mixture leftover from earlier this week. This time, I rolled out the dough thinner and cut them larger so that it would fill the whole muffin cup, and thus hold more egg mixture. This proportion seemed to work out nicely; you get enough of the pastry to hold everything in but it doesn’t overpower the egg custard. I’d definitely like to add more eggs to the egg custard mixture next time, but I’ll have to wait until the summer to experiment some more. I’ll most definitely miss my kitchen back home when I head back to London tomorrow!

eggtart_01